HPP: Full Reference
Our HPP reference is here to help you find those hard-to-find bits of information all in one place. Use the navigation on the right to find your way around the page.
Redirecting customers to HPP
You can use a Payment Link (standard HTML form) or Payment Widget (JS) to collect and pass payment and customer details to HPP. More about integration methods you could find here.
When the customer selects the payment option, your website should post the HTML form containing their transaction details to: https://com.paycore.io/hpp/.
The HTML form should contain the mandatory hidden input fields listed in Configuration.
You could use a secure method of obtaining a precreated Payment Invoice ID before redirecting customers to HPP, as described in Secure redirection method.
Tips for improving the customer experience
- Any parameters that you pass through in your HTML form, such customer details as first name, last name, and email, will be automatically populated (or populated and hidden) as appropriate, on the HPP making it easier for the customer to complete these forms.
- You can customize the appearance of the HPP using the options described in Customization Guide.
- To maximise conversion, Corefy recommends that you redirect customers to the HPP in the same browser window or embed the HPP in an iframe (see Embedding on Quickstart Guide.
Secure redirection method
This method can be used to ensure that details of the payment are communicated securely between your server and Corefy.
Important!
We strongly recommend that you use this method when redirecting your customers to Corefy, as it does not require sending any payment parameters to their browser. This prevents customers from being able to view or modify any hidden parameters in your source code.
The redirection process is as follows:
- Your web server makes a standard POST request with the payment parameters, using the Commerce Private API.
- The Corefy server prepares a Payment Invoice for the payment and returns a standard HTTP(S) response with it.
- Your web server takes the body of the response which contains a Payment Invoice ID value.
- Using this Payment Invoice ID value the customer can be redirected to:
https://com.paycore.io/hpp/?cpi=<PAYMENT_INVOICE_ID>
<script async src="https://unpkg.com/@paycore/payment-widget-js@0.1.93/dist/paymentWidget.umd.min.js"></script>
<script>
window.payment_widget.init({
    cpi: "<PAYMENT_INVOICE_ID>",
});
</script>
<div id="payment_widget" style="width: 375px; height: 600px;"></div>
Configuration options
This is a complete list of HPP configuration options.
Your integration type decides how you set your parameters.
General requirements
HPP works only with:
- active commerce account
- which allows public creation for payment invoices
- and has at least one active currency
Please contact your account Administrator if you need to set up those options for it.
Language Encoding for Text Parameters
All text fields use UTF-8 encoding.
URL parameters
All URL parameters must include the scheme at the front of the URL for example: https://. For example instead of www.google.co.uk you would need to use https://www.google.co.uk.
Basic
All following fields are required:
| Key | Type | Description |
|---|---|---|
public_key * | string | Public key of your commerce account — find it in the Dashboard. |
amount * | float | The payment invoice amount. |
currency * | string | The payment invoice currency (three-letter ISO 4217 code). |
Example: Basic payment
<script async src="https://unpkg.com/@paycore/payment-widget-js@0.1.93/dist/paymentWidget.umd.min.js"></script>
<script>
window.HPPConfig = {
    public_key: "<your_public_key>",
    amount: 100.00,
    currency: "USD"
};
</script>
<div id="payment_widget" style="width: 375px; height: 600px;"></div>
<form action="https://com.paycore.io/hpp/" method="get">
    <input type="hidden" name="public_key" value="<your_public_key>" />
    <input type="hidden" name="currency" value="USD" />
    <input type="hidden" name="amount" value="100" />
    <input type="submit" value="Pay" />
</form>
Available currencies
You can only create payments in currencies that have been enabled for your Commerce account. Please contact your account Administrator if you need to process in additional currencies.
Test mode
When you're processing live payments, replace Public Live Key with Public Test Key.
Optional
Optional values allow the user to more flexibly configure the HPP and add more information about payment invoice. For example, specify the validity period of payment invoice.
| Key | Type | Description |
|---|---|---|
reference_id | string | Unique reference id of payment invoice. |
description | string | Description of the payment invoice. |
expires | int | UNIX timestamp, UTC+0 |
Example: Payment with optional details
<script async src="https://unpkg.com/@paycore/payment-widget-js@0.1.93/dist/paymentWidget.umd.min.js"></script>
<script>
window.HPPConfig = {
    public_key: "<your_public_key>",
    amount: 100.00,
    currency: "USD",
    reference_id: "<your_unique_reference_id>",
    description: "Some goods",
    expires: 1602414000
};
</script>
<div id="payment_widget" style="width: 375px; height: 600px;"></div>
<form action="https://com.paycore.io/hpp/" method="get">
    <input type="hidden" name="public_key" value="<your_public_key>" />
    <input type="hidden" name="currency" value="USD" />
    <input type="hidden" name="amount" value="100" />
    <input type="hidden" name="reference_id" value="<your_unique_reference_id>" />
    <input type="hidden" name="description" value="Some goods" />
    <input type="hidden" name="expires" value="1602414000" />
    <input type="submit" value="Pay" />
</form>
Idempotency
Idempotency prevents the processing of duplicate payment requests by using unique keys set in reference_id property.
Each reference_id must be a Unique Identifier, and you must manage the generation of your own keys to ensure that duplicates are not generated accidentally. Duplicate keys are only detected when provided by the same Commerce Account, so only submissions you provide can throw a duplicate error.
UUIDs are very large (128-bit) numbers. To avoid the "accidental" creation of duplicate keys, we recommend using a randomly generated UUID for your reference_id. This is especially important when generating reference_id for different payment requests.
Customer details
The customer element contains more information about the customer making the payment.
It includes customer[email], which we can use to send an email to the shopper when the payment is authorised or refused (if you choose to enable this notification channel).
Set in customer key a customer object with following optional properties:
| Key | Type | Description |
|---|---|---|
reference_id * | string | The customer's unique reference ID. |
email | string | The customer's email address. |
phone | string | The customer's phone number. |
name | string | The customer's name. |
metadata | array[key:value] | The customer's metadata. |
Example: Payment with customer details
<script async src="https://unpkg.com/@paycore/payment-widget-js@0.1.93/dist/paymentWidget.umd.min.js"></script>
<script>
window.HPPConfig = {
    public_key: "<your_public_key>",
    reference_id: "<your_unique_reference_id>",
    amount: 100.00,
    currency: "USD",
    description: "Some goods",
    customer: {
        reference_id: "cus_1234567",
        email: "somename@domain.com",
        name: "John Wick",
        metadata: {
            key1: "value1",
            key2: "value2"
        }
    }
};
</script>
<div id="payment_widget" style="width: 375px; height: 600px;"></div>
<form action="https://com.paycore.io/hpp/" method="get">
    <input type="hidden" name="public_key" value="<your_public_key>" />
    <input type="hidden" name="reference_id" value="<your_unique_reference_id>" />
    <input type="hidden" name="currency" value="USD" />
    <input type="hidden" name="amount" value="100" />
    <input type="hidden" name="description" value="Some goods" />
    <input type="hidden" name="customer[reference_id]" value="cus_1234567" />
    <input type="hidden" name="customer[email]" value="somename@domain.com" />
    <input type="hidden" name="customer[name]" value="John Wick" />
    <input type="hidden" name="customer[metadata][key1]" value="value1" />
    <input type="hidden" name="customer[metadata][key1]" value="value2" />
    <input type="submit" value="Pay" />
</form>
Auto process
The service and the service_fields fields are used to take the customer directly to a specific payment service gateway. Example: service: paypal_usd_hpp.
If the service has mandatory fields, the you need also specify them in service_fields field.
| Key | Type | Description |
|---|---|---|
service | (string) ServiceCode | The code of service you want to autoprocess. Example: bitcoin_btc_hpp. |
service_fields | (object) string[key:value] | Fields of selected service. Example: [{'name': 'John Doe'}] |
Example: Payment with auto process
<script async src="https://unpkg.com/@paycore/payment-widget-js@0.1.93/dist/paymentWidget.umd.min.js"></script>
<script>
window.HPPConfig = {
    public_key: "<your_public_key>",
    amount: 100.00,
    currency: "USD",
    service: "paypal_usd_hpp"
};
</script>
<div id="payment_widget" style="width: 375px; height: 600px;"></div>
<form action="https://com.paycore.io/hpp/" method="get">
    <input type="hidden" name="public_key" value="<your_public_key>" />
    <input type="hidden" name="currency" value="USD" />
    <input type="hidden" name="amount" value="100" />
    <input type="hidden" name="service" value="paypal_usd_hpp" />
    <input type="submit" value="Pay" />
</form>
Try it out in Sandbox
You can check all enable services in sandbox. Also, the user can configure payment link or code snippet to execute on the client page. 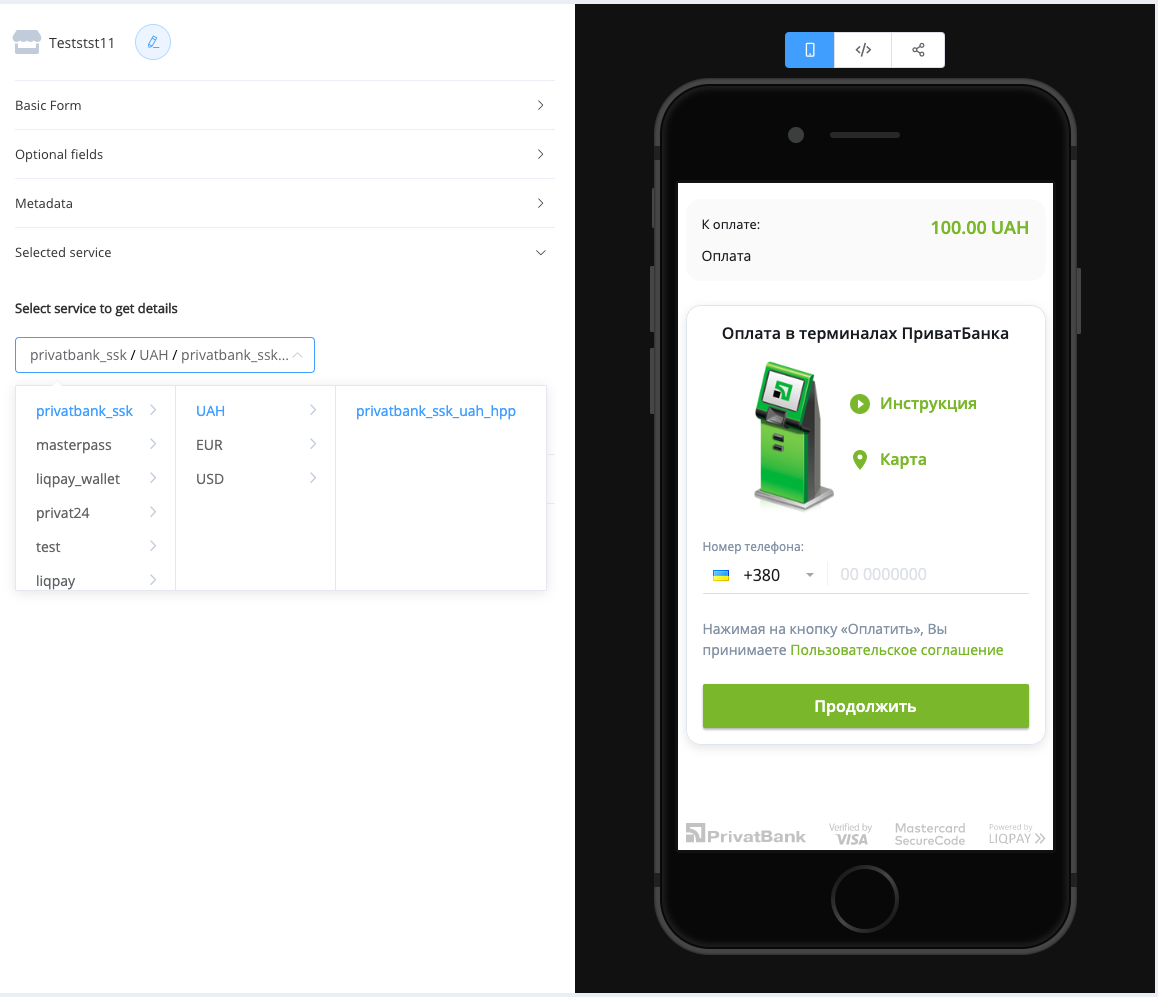
Return URL
Provide custom return_url so that your shoppers are returned to your website at the end of the payment process.
If return_url are not provided, shoppers are redirected to one of Corefy's default result pages, where the payment journey ends.
You could override the return URL on individual transactions in options key a options object with following optional properties:
| Key | Type | Description |
|---|---|---|
return_url | string | The customer's redirect URL at the end of the payment process. |
With Auto return turned on in your Commerce account, you can set the value of the return_url variable on individual transactions, which overrides the value of the return URL stored in your Commerce account settings.
For example, you might want to redirect payers to a URL on your site that is specific to that person, perhaps with a session-id or other transaction-related data included in the URL.
To set the return URL for individual transactions, include the return_url variable in the payment invoice configuration.
Example: Payment with custom return URL
<script async src="https://unpkg.com/@paycore/payment-widget-js@0.1.93/dist/paymentWidget.umd.min.js"></script>
<script>
window.HPPConfig = {
    public_key: "<your_public_key>",
    return_url: "https://somedomain.com/",
    amount: 100.00,
    currency: "USD",
    description: "Some goods"
};
</script>
<div id="payment_widget" style="width: 375px; height: 600px;"></div>
<form action="https://com.paycore.io/hpp/" method="get">
    <input type="hidden" name="public_key" value="<your_public_key>" />
    <input type="hidden" name="return_url" value="https://somedomain.com/" />
    <input type="hidden" name="currency" value="USD" />
    <input type="hidden" name="amount" value="100" />
    <input type="hidden" name="description" value="Some goods" />
    <input type="submit" value="Pay" />
</form>
Note
It's not possible to override the Callback URL cause of the security violations. You must specify it Commerce Account settings.
Auto return the buyer to your website
With Auto return for Corefy payments, buyers are not required to click a button to return to your website after they complete their payments with Corefy. Auto Return applies to all Corefy Payments Standards payment buttons, including Buy Now, Shopping Cart, Subscription, and Donate buttons.
Auto Return shortens the checkout flow and immediately brings your buyers back to your website upon payment completion. To set up Auto Return, you need to turn it on in your Corefy account profile and enter the return URL that will be used to redirect your buyers back to your site. For more information on how to enable this feature in your Corefy account, see Auto return in the Commerce Account setup and administration guide.
Localization
HPP supports following languages in multiple regions around the world: English, Ukraininan, Russian.
| Key | Type | Description |
|---|---|---|
locale | string | The ISO 639-1 code of one of predefined languages. Enum: en, uk, ru (Default: The user browser language). |
Example: Payment with predefined language for the UI
<script async src="https://unpkg.com/@paycore/payment-widget-js@0.1.93/dist/paymentWidget.umd.min.js"></script>
<script>
window.HPPConfig = {
    public_key: "<your_public_key>",
    locale: "uk",
    amount: 100.00,
    currency: "USD",
    description: "Some goods"
};
</script>
<div id="payment_widget" style="width: 375px; height: 600px;"></div>
<form action="https://com.paycore.io/hpp/" method="get">
    <input type="hidden" name="public_key" value="<your_public_key>" />
    <input type="hidden" name="locale" value="uk" />
    <input type="hidden" name="currency" value="USD" />
    <input type="hidden" name="amount" value="100" />
    <input type="hidden" name="description" value="Some goods" />
    <input type="submit" value="Pay" />
</form>
Customization
One of our favorite things about HPP is its customizability. By following this styling guide, you can make changes to just about anything.
Display
Language and HPP layout settings.
Set in display key as an array object with the following properties:
| Key | Type | Description |
|---|---|---|
hide_header | bool | Flag to hide header on HPP. Default: false. |
hide_footer | bool | Flag to hide footer on HPP. Default: false. |
hide_progress_bar | bool | Flag to hide progress bar on HPP. Default: false. |
hide_method_filter | bool | Flag to hide method filter bar on HPP. Default: false. |
hide_lifetime_counter | bool | Flag to hide lifetime counter on HPP (if the expires date was passed). Default: false. |
Filtering
Soon...
This feature not currently implemented.
For some payment requests, you may decide to filter the payment methods that are displayed on the HPP or bypass the HPP entirely.
Set in display key as an array object with the following properties:
| Key | Type | Description |
|---|---|---|
show_methods | array[method_codes] | Flag to display specific payment methods. |
hide_methods | array[method_codes] | Flag to prevent specific payment methods from being displayed. |
Configured payment services
All the payment services that are configured for your account, including the value you use to indicate the specific payment method, are available in the Dashboard interface under Commerce Account Settings > Payment Methods > Name.
Styling
HPP can be customized to fit seamlessly with your brand. All customizations are achieved using selectors, properties and values in a manner very familiar to developers.
You can define advanced styling and customization of HPP by setting the styling property style in the configuration object.
The available options for the styling object:
| Key | Description |
|---|---|
pay_button_label | Label on pay button translated on all supported languages. Enum: pay, subscribe, donate. |
show_method_logo | Payment methods has icons or logos to show on their card previews. |
theme | Our themes include several options to change the layout, colors and fonts of your payment page. Enum: light, dark. |
success_color | Success color to show success notifies / messages. |
warning_color | Warning color to show warning notifies / messages. |
danger_color | Danger color to show danger notifies / messages. |
info_color | Info color to show information notifies / messages. |
primary_color | Accent color. |
primary_variant | Based on primary color, or can be passed by you. If primary color will be dark - then this variable will be lighter. Used on most important UI components (stepper,buttons). |
primary_text_color | Primary text color, that used mostly everywhere. |
primary_background_color | Primary backgoround color. |
on_primary_color | The most readable color on elements with primary color fill. Based on primary_background_color color, or can be passed by you. |
secondary_color | Secondary color. |
secondary_variant | Based on secondary color, or can be passed by you. If secondary color will be dark - then this variable will be a few tones lighter. Used on secondary UI components. |
secondary_text_color | Secondary text color, used mostly on secondary UI components. |
secondary_background_color | Secondary background color (payment method cards). |
on_secondary_color | The most readable color on elements with secondary_background_color fill. Based on secondary_background_color color, or can be passed manually by you. |
Use the tabs below to view an example of styling, and a reference of selectors to use when styling your version of HPP.
Button label
payment_widget.init({
public_key: "YOUR_COMMERCE_ACCOUNT_PUBLIC_KEY",
amount: "100.00",
currency: "USD",
style: {
    pay_button_label: "pay",
    },
});
Metadata
Configuration property:
| Key | Description |
|---|---|
metadata | Set of key/value pairs. Additional key:value info about your invoice. |
In the example above we suppose you will store the reference_id that’s unique to the payment in your order table. This way your website is able to look-up the order for this payment when the callback is sended by Corefy. Your website is keeping track of the payment, effectively bringing about the connection between order and payment. This approach is easiest to grasp, which is why we use it in our example.
Alternatively you could ask Corefy to remember the unique identifier of your order by instructing the Corefy API to store it in the payment’s metadata. You would provide it while creating the payment. In our example order_id would be a good candidate. Corefy stores the metadata for you, when you fetch the payment during processing the callback the metadata is included in the response. This is another way to connect orders and payments. We advise to use the metadata approach. This is the most popular approach and it’s easiest to implement.
If you want to store additional/custom data at a resource's level, you can make use of Corefy's Metadata.
For example, if you're a data service provider and want to store certain features of a particular plan, say "Usage Limit", "Speed within limit", etc., you can store it in the Metadata of the Plan.
Considering the same example as above, if you want to store the additional features of a particular data plan here's what the JSON will look like:
Example: Payment with additional fields (metadata)
<script async src="https://unpkg.com/@paycore/payment-widget-js@0.1.93/dist/paymentWidget.umd.min.js"></script>
<script>
window.HPPConfig = {
    public_key: "<your_public_key>",
    reference_id: "<your_unique_reference_id>",
    amount: 100.00,
    currency: "USD",
    description: "Some goods",
    metadata: {
        "usage-limit": "5GB",
        "speed-within-quota": "2MBbps",
        "post-usage-quota": "512kbps"
    }
};
</script>
<div id="payment_widget" style="width: 375px; height: 600px;"></div>
<form action="https://com.paycore.io/hpp/" method="get">
    <input type="hidden" name="public_key" value="<your_public_key>" />
    <input type="hidden" name="reference_id" value="<your_unique_reference_id>" />
    <input type="hidden" name="currency" value="USD" />
    <input type="hidden" name="description" value="Some goods" />
    <input type="hidden" name="amount" value="100" />
    <input type="hidden" name="metadata[usage-limit]" value="5GB" />
    <input type="hidden" name="metadata[speed-within-quota]" value="2MBbps" />
    <input type="hidden" name="metadata[post-usage-quota]" value="512kbps" />
    <input type="submit" value="Pay" />
</form>
Note
- Metadata is completely for your reference and will not be visible to customers.
- Metadata will not be a filter criteria, or a part of the exports.
Embed options
We provide two ways to integrate:
- Full-page redirect: Redirect to a customizable hosted payment page.
- Embedded (iframe or lightbox): Display an overlay payment form on your site.
Full-page redirect
The Hosted Payment Page are displayed full-page in a browser. When your customers are redirected to the Hosted Payment Page, the web address for the Hosted Payment Page is displayed. Full-page redirect supports over 60 payment methods.
Set target field to redirect for Payment Widget integration method.
<script async src="https://unpkg.com/@paycore/payment-widget-js@0.1.93/dist/paymentWidget.umd.min.js"></script>
<script>
window.HPPConfig = {
    public_key: "<your_public_key>",
    amount: 100.00,
    currency: "USD",
    description: "Some goods",
    target: "redirect"
};
</script>
<form action="https://com.paycore.io/hpp/" method="get" target="_self">
    <input type="hidden" name="public_key" value="<your_public_key>" />
    <input type="hidden" name="currency" value="USD" />
    <input type="hidden" name="description" value="Some goods" />
    <input type="hidden" name="amount" value="100" />
    <input type="submit" value="Pay" />
</form>
Embedded (iframe or lightbox)
The Hosted Payment Page are displayed in an iframe or lightbox within your website. When you redirect your customers to our payment page, the web address for your website remains unchanged, providing a more seamless shopping experience. An iframe or lightbox integration requires a more advanced integration.
We apply responsive web design to payment content displayed in an iframe or lightbox. When the width of the parent page is resized, the content in the iframe or lightbox is automatically adjusted.
Depending on the content being displayed, the height of the iframe or lightbox may increase. For an iframe, the content in the parent page that is below the iframe is pushed down as the payment page content expands vertically.
Set target field to iframe and create HTML tag to insert HPP into. Define selector_id key in widget configuration options. selector_id by default is payment_widget.
<script async src="https://unpkg.com/@paycore/payment-widget-js@0.1.93/dist/paymentWidget.umd.min.js"></script>
<script>
window.HPPConfig = {
    public_key: "<your_public_key>",
    amount: 100.00,
    currency: "USD",
    description: "Some goods",
    target: "iframe"
};
</script>
<div id="payment_widget" style="width: 375px; height: 600px;"></div>
<form action="https://com.paycore.io/hpp/" method="get" target="payment_frame">
    <input type="hidden" name="public_key" value="<your_public_key>" />
    <input type="hidden" name="currency" value="USD" />
    <input type="hidden" name="description" value="Some goods" />
    <input type="hidden" name="amount" value="100" />
    <input type="submit" value="Pay" />
</form>
<iframe name="payment_frame" src="" id="payment_frame" width="100%" height="600"></iframe>
Security and cross-domain browser restrictions
Although possible, using iFrames can introduce known usability, security and cross-domain browser issues.
Keep the following in mind:
- Some redirect payment methods, such as iDEAL, do not allow displaying their pages in an iFrame; they will break out of it. Other redirect payment methods may require more available screen space than your iFrame allows. You should also be prepared to handle the difference in behaviour for the payment callback URL, as once the payment completes you may not be in an iFrame anymore.
- Another problem you may face is the browser's cookie policy. The HPP solution requires cookies. Using an iFrame means that the browser may impose restrictions regarding the conditions in which cookies are allowed to be set within the iFrame. While there are workarounds to get the browser to accept cookies in a default configuration, the shopper may have configured a more restrictive policy. The most common problem is with Apple Safari and Google Chrome browsers: by default, they require user-initiated page loading inside an iFrame. This means that first the iFrame needs to be loaded with a page hosted at the parent domain. Secondly, on this page the user needs to actively click on a button submitting the redirect to the HPP.
Corefy cannot guarantee that all payment methods will work when using an iFrame, nor that the behaviour of a payment method will remain the same. Furthermore, the exact operation of a redirect payment method can differ between the test and the live environments.
Payment Widget
Library
The fastest and easiest way to use our HPP is to use paymentWidget.js.
To integrate the widget into your website, you can download it from the CDN or integrate the library into your javascript build.
Repository: unpkg.com/@paycore/payment-widget-js
CDN:
<script async src="https://unpkg.com/@paycore/payment-widget-js@0.1.93/dist/paymentWidget.umd.min.js"></script>
<script async src="https://unpkg.com/@paycore/payment-widget-js@0.1.93/dist/paymentWidget.umd.js"></script>
Initialization
We offer three ways to integrate payment_widget.js into your website, so you can pick the one that best fits your requirements:
-
window.payment_widget.init()payment_widget.js can only be run synchronously with this method.
-
window.HPPConfigOur recommended option, which allows you to run
payment_widget.jssynchronously or asynchronously.
After you have specified all the required fields and customized your HPP, you will see a list of payment methods.
<script src="https://unpkg.com/@paycore/payment-widget-js@0.1.93/dist/paymentWidget.umd.min.js"></script>
<script>
window.payment_widget.init({
    public_key: "<your_public_key>",
    amount: 100.00,
    currency: "USD",
    description: "Some goods",
    target: "redirect"
    });
</script>
<script async src="https://unpkg.com/@paycore/payment-widget-js@0.1.93/dist/paymentWidget.umd.min.js"></script>
<script>
window.HPPConfig = {
    public_key: "<your_public_key>",
    amount: 100.00,
    currency: "USD",
    description: "Some goods",
    target: "redirect"
    };
</script>
Configuration
| Key | Type | Description |
|---|---|---|
base_url | string | The link on which your HPP is located. Is necessary in case of placing HPP on your own domain (for example pay.yourdomain.сom). |
selector_id | string | ID of DOM element you want HPP to insert into. Default: payment_widget. |
frame_id | string | ID of the frame that will be inserted Default: payment_frame. |
target | string | User can insert HPP inside iframe on page, or open HPP in new tab in browser iframe, redirect. Default : iframe. |
Example: Additional widget configuration
<script src="https://unpkg.com/@paycore/payment-widget-js@0.1.93/dist/paymentWidget.umd.min.js"></script>
<script>
window.payment_widget.init({
    base_url: "https://pay.yourdomain.сom/hpp/",
    selector_id: "payWidget",
    frame_id: "payFrame",
    target: "redirect",
    public_key: "<your_public_key>",
    amount: 100.00,
    currency: "USD",
    description: "Some goods"
    });
</script>
<script async src="https://unpkg.com/@paycore/payment-widget-js@0.1.93/dist/paymentWidget.umd.min.js"></script>
<script>
window.HPPConfig = {
    base_url: "https://pay.yourdomain.сom/hpp/",
    selector_id: "payWidget",
    frame_id: "payFrame",
    target: "redirect",
    public_key: "<your_public_key>",
    amount: 100.00,
    currency: "USD",
    description: "Some goods",
};
</script>
Actions
| Method | Description |
|---|---|
init(object) | Accepts configuration and initializes widget with HPP. |
reinit(object) | Accepts configuration and reinitializes widget. |
close(object) | Accepts configuration and closes widget. |
Examples
window.payment_widget.init({
    public_key: "<your_public_key>",
    amount: "100.00",
    currency: "USD",
    });
window.payment_widget.reinit({
    public_key: "<your_public_key>",
    amount: "100.00",
    currency: "USD",
    });
window.payment_widget.close({
    frame_id: "<id_of_frame>", // By default: `payment_widget`
    });
Events
The widget handles a number of events that are generated by HPP which you can handle for various purposes.
The table below provides the full list of events that you can attach one or more handlers to.
| Event name | When |
|---|---|
ready | Triggered when HPP is registered on the global namespace and safe to use. |
rendered | Triggered when HPP is rendered in iframe and ready to use by customer. |
return | User click's on "Return to shop" button on success page. Removes the iframe from client page by default. |
Adding an event handler
Events constants
Event constants on the JavaScript API are accessible via payment_widget.events.
There are three ways to add an event handler:
-
Method 1: The standard approach
window.payment_widget.bindEventListener(payment_widget.events.<EVENT_CONSTANT>, handler)window.payment_widget.bindEventListener(<event_name>, handler)window.payment_widget.bindEventListener('delete', () => {console.log("Iframe closing handle")}) -
Method 2: Configuration options
window.payment_widget.init({ public_key: 'pk_test_<your_key>', handlers: { <event_name>: handler } });window.HPPConfig = { public_key: 'pk_test_<your_key>', handlers: { <event_name>: handler } }; -
Method 3: Listen iframe events
You could listen to events directly from iframe if you don't use our Payment Widget (JS).
window.addEventListener(<event_name>, callback, false);Get more about Cross-window communication documentation.
Can we help?
Thanks for using Corefy. If you need any help or support, then message our support team at support@corefy.com.