![]()
XPAY
One application managing your finances
Website: xpay.com.ua
Follow the guidance for setting up a connection with XPAY payment service provider.
Set Up Account
Step 1: Contact XPAY support
Send a request on the website, call the hotline, or connect with the XPAY support team via Telegram or Facebook. You also may use the XPAY application for registration.
Submit the required documents to verify your account and gain access.
Step 2: Generate a key pair
Use our library for XPAY or generate the keys on your own. Requirements for encryption keys: RSA key 2048 bits length, packaged by the PKIX algorithm, .pem format.
Example of key generating commands
openssl genrsa -out keypair.pem 2048
openssl rsa -in keypair.pem -pubout -out publickey.crt
Save your private key to a .txt file but never share it unless connecting XPAY at the Corefy dashboard.
Step 3: Share your Public key with XPAY and get credentials
Send the generated public key to the XPAY support manager. Receive from XPAY:
- Partner Token
- XPAY Public Key
To configure your merchant ID, XPAY may request URLs for payment status checking. Define accordingly:
https://psp-ext.paycore.io/xpayua/checkas the Check request URLhttps://psp-ext.paycore.io/xpayua/callbackas the Pay request URL
Important
You require to provide a white list of IPs for connecting XPAY, so be sure to include the Corefy IP addresses on the list.
Connect Provider Account
Step 1. Connect account at the Corefy Dashboard
Press Connect at XPAY Provider Overview page in 'New connection' and choose Provider account option to open Connection form.
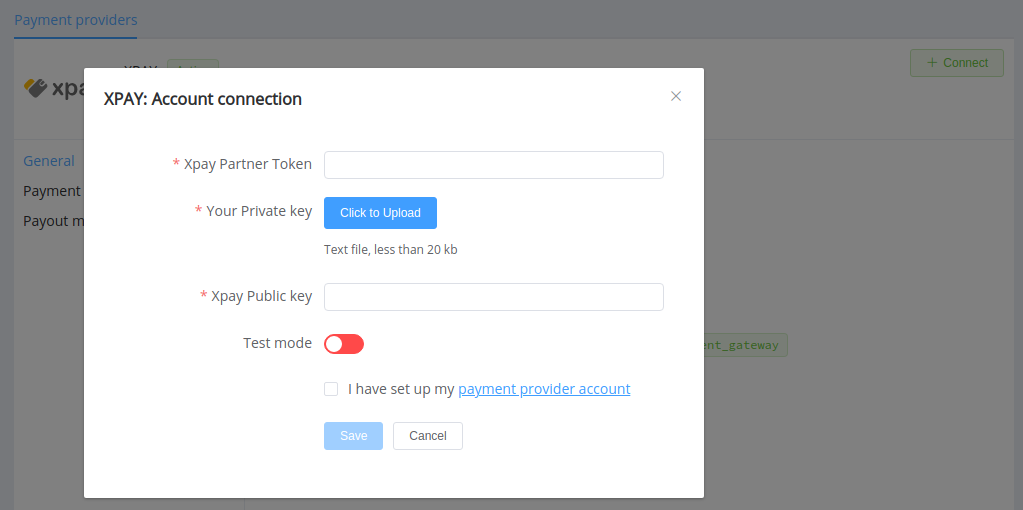
Enter credentials:
- XPAY partner token
- XPAY public key
Upload the .txt file with your private key. Also, select Test or Live mode according to the type of account to connect.
Success
You have connected XPAY account!